Quantcast
Channel: The Painting Bunker
Viewing all 65 articles
Browse latest View live

Aaron Bailey’s Sons of Horus on the Forge World Realm of Battle Cityscape Boards

$
0
0

Hey everyone,

Heres something to get you very excited.  My good friend, fellow blogger and painter extraordinaire who’s models have featured on the front page of Games Workshops blog found their way to The Painting Bunker today and we couldn’t help ourselves so we staged a few shots for your viewing pleasure.  I think you’ll agree with me in that these pictures look amazing.

We are actually planning on fighting the campaign from the Betrayal when I get these boards finished and have painted my World Eaters, so this is just a taste of things to come.

Behold!

Sons of Horus on Cityscape 1 Sons of Horus on Cityscape 2 Sons of Horus on Cityscape 3 Sons of Horus on Cityscape 4 Sons of Horus on Cityscape 5Hope you enjoy!

Cheers

John


Forge World Realm of Battle Concourse Sector 2 – Finished

$
0
0

So, four down now, four to go!  Half way mark, and oh boy am I feeling it…  It’s been a big job thus far.  This is the last of the two Concourse Sectors that I brought way back on 12 December 2012… It’s a little bit shocking for me to think that about two months ago these bad boys rocked up on my door step.  It’s been a bit of an obsession for me over the summer.

So far the boards that I’ve completed I’ve been very happy with, and this one is no exception.  This one is meant to be a Chaplaincy and some form of accommodation for the attendants of the Cathedral.  So I’ll let the pictures do the talking and make a few comments on each of the pictures to guide you through what I was thinking at the time, and as usual you can get more of an idea about the process from flicking through the working photos gallery at the bottom of this post.

Forge World Realm of Battle Cityscape Concourse Sector 1

I really wanted the larger of the two buildings, the accommodation block, to have a very distinctive feature so I went back through a few photos of cathedrals etc and found that certain types of places of worship have domes on top, so I thought it’d look cool.  I also made the roof line overhand the building facade, sort of like an eve.  I did this to help break up the shape of the building (a rectangle) and to allow the addition of the buttresses (pic below)  I didn’t want the roof to have a barrier on it, like all the other buildings featured, however I did feel it needed something, so I added a small hand rail with the eagle heads as the posts.  I think it makes an interesting look and I’m very happy with how it turned out.  For those that are interested the dome is a toy soccer ball.  I chose it because it was 1.  The right size, 2.  It had and interesting diamond pattern over its surface as opposed to being just smooth, and 3. It didn’t have any other features embossed on it, like a manufactures mark, random shapes or whatever.

You can see what it looked like before I painted it in the working photos gallery at the bottom.  I’ve still got the other half, so perhaps It’ll feature in some other piece of scenery on anther board (yes, I’m already planning another board when I finished with this one….)
Forge World Realm of Battle Cityscape Concourse Sector 5
Forge World Realm of Battle Cityscape Concourse Sector 4

Forge World Realm of Battle Cityscape Concourse Sector 3

Forge World Realm of Battle Cityscape Concourse Sector 2

Forge World Realm of Battle Cityscape Concourse Sector 6

Forge World Realm of Battle Cityscape Concourse Sector 7

As with other multi story buildings I’ve made, this one is also broken up into its various floors to make gaming with it easier…. If you look closely you can see small posts.  These are in each corner and key into the upper floor to make the building more stable when assembled.  Forge World Realm of Battle Cityscape Concourse Sector 8

Forge World Realm of Battle Cityscape Concourse Sector 9

One thing that I am really pleased with so far, but sadly you can not see, is the way the boards and buildings interrelate to one another.  The boards when all put together really are starting to look like a small city block, the different heights of the buildings, the features which distinguish them, the story they tell and the “conversations” they have with one another through the narrative I’m trying to create all enhance the effect and produce a result that is greater than the sum of its parts.

With just two more boards to do to give me a 6′ x 4′ playing surface so that a proper game can be played on them, I’m starting to get very excited and can now see the light at the end of the tunnel.  I have to admit though, I am now starting to want to paint some actual minis, however I’m just going to have to wait until I get the last few boards done.  I anticipate the pace of my updates is going to somewhat slow down come next week as my studies commence and it’ll be nose to the grind stone.  But we’ll see what happens.

IMG_196201 IMG_196302 IMG_196605 IMG_196706 IMG_196907 IMG_197008 IMG_197109 IMG_197210 IMG_197311 IMG_197412 IMG_197513 IMG_197614 IMG_197715 IMG_197816 IMG_197917 IMG_198018 IMG_198119 IMG_198220 IMG_198321 IMG_198422 IMG_198523 IMG_198624 IMG_198725 IMG_199626 IMG_199827 IMG_199928 IMG_200129 IMG_200230 IMG_200331 IMG_200432 IMG_200533 IMG_200634 IMG_200735 IMG_200836 IMG_201237 IMG_201338 IMG_201439

Thats if for now, thanks for dropping in

John


Forge World Realm of Battle Cityscape Generatourm Sector 2 – Finished

$
0
0

Today is a good day.  I finished off the fifth Realm of Battle board of the eight that I started a little over two months ago.  This board has thus far been by far the most challenging I’ve completed.  Both technically and creatively.  I remember at one point thinking I’ve arrived at the place where my vision and my technical ability no longer over lap.  I kept going though, determined to push myself and see what I started through.  I’m glad I did preserver too  because the final piece is my most pleasing to date.

I also have to point out that I’ve been doing some work on my photography skills and had some tutoring from my friend and fellow Blogger Troy on using Photoshop.  I went and downloaded photoshop and this morning Troy spend several hours with me showing me some basic techniques to improve the quality of the pictures that I post on my blog.  You’ll notice that they look different, although not perfectly the way I’d like them its a new direction for me and I intend on working on this skill and honing it moving forward.  Go and have a look at Troy’s blog too, its still model building just a different genre to ours.  I am working on him though you’ll all be happy to hear.  Thanks again for your help on this Troy and being so generous with your time.

So lets get down to business,  I’ll put up some pictures and leave a few remarks under each one and walk you through what went on.  Also, take a good look at the working photos to see what I meant.  It may not look like much, but a lot of work went into these pieces and I think I jagged bits of it too.

forge-world-realm-of-battle-cityscape-generatorum-sector-1The overpass of doom and spiral stair case of despair…  As some of you will remember one of the first boards I did was of a giant crane that I purchased for $35!!! (can you believe it!) from Toys’r us.  Well, when I built that crane I had two of the centre sections left and I always planned on using them on one of the other boards.  With the last board of the industrial precinct about to commence I thought it would make sense to use it somewhere on it, and seeing as it looked a bit like a walk way, I thought it would be interesting having it spanning over the large double lane road that runs through the centre of this board.  I knew one of the ends of the walk way would run into a building, however I had to really put my thinking cap on to work out where the other end would go.

One of the first technical challenges I had to overcome was the heights.  One end that went into a building was more or less governed how high it was going to be, in this case, on the second story of a three story building.  What made it difficult though was the foundation that the building was resting on, it was just a random height, and the other side was at street level.  So the building on the other side, even if it was a GW plastic kit, would not match up height wise and the walk way would be un-level.

forge-world-realm-of-battle-cityscape-generatorum-sector-2

Enter the spiral stare case of despair.  Wow did this test me.  You can see in the working photos whats gone into it.  It was a real challenge.  But I have to say, it was an enjoyable one, at no time did I ever feel like throwing it against the wall and jumping on it.

Which is new for me.

The whole way I just would come up to another technical challenge and work out the solution…  I did do a fair few sketches too of this piece before I assembled it, I knew the height I needed it to be, then it was a case of just doing some math and a bit of straight forward planning and then following that plan.  However it was still challenging, and even with all my planning I wasn’t sure if it was going to go together when I finished it.  forge-world-realm-of-battle-cityscape-generatorum-sector-3


The final piece is the storage tank.  I really like this piece most of it is actually scratch built too.  It was great fun making it and looks awesome, remember when in doubt modelling add an Imperial Eagle, when in doubt painting add hazard stripes.  forge-world-realm-of-battle-cityscape-generatorum-sector-4

forge-world-realm-of-battle-cityscape-generatorum-sector-5

Love this shotforge-world-realm-of-battle-cityscape-generatorum-sector-6

forge-world-realm-of-battle-cityscape-generatorum-sector-7


So there you go.  I really hope you like the pieces and the new style of photos I’ve put up.  I’d be interested in hearing your comments too if you feel the urge to share your thoughts.

Until next time

John

IMG_201901 IMG_202002 IMG_202103 IMG_202204 IMG_202305 IMG_202406 IMG_202507 IMG_202808 IMG_202909 IMG_203010 IMG_203111 IMG_203212 IMG_203313 IMG_203414 IMG_203515 IMG_203616 IMG_203717 IMG_203818 IMG_203919 IMG_204020 IMG_204121 IMG_204222 IMG_204323 IMG_204424 IMG_204525 IMG_204626 IMG_204727 IMG_204828 IMG_204929 IMG_205030 IMG_205131 IMG_205232 IMG_205333 IMG_205434 IMG_205535 IMG_205636 IMG_205737 IMG_205838 IMG_205939 IMG_206040 IMG_206141 IMG_206242 IMG_206343 IMG_206444 IMG_206545 IMG_206646 IMG_206747 IMG_206848 IMG_206949 IMG_207050

Forge World Realm of Battle Cityscape 6 x 4 board – Complete

$
0
0

phew!

It’s finally done, a 6 x 4 playing surface to wage eternal war on.  After almost three months of painting and building and some more painting I’ve completed six of the Forge World Realm of Battle Cityscape boards.  The last board of the six I needed to paint was a Primus Sector.  Although I still have one more Primus Sector and one more Shattered Plaza to go, I’m claiming this victory because now I can have a legitimate game of 40k on these boards.

I have to confess, I’m getting sick of painting scenery.  So in a way I’m glad that I’ve reached this mile stone right at the point where my threshold for making more scenery is about at its limit.  I’m now ready to take a short break and then begin working on my 30k World Eaters.

So lets talk Primus Sector for a minute, then we’ll have a look at it and then take a look at some photos of it and the completed board.  So the Primus Sector board is an unusual board in that its only one building.  Yes I know the Shattered Plaza is to, but it takes up most of the board, however the Primus Sector is just a lot of roads and then one large foundation more or less in the middle of the board piece.  The other unusual feature is that again, unlike all the other boards the foundation isn’t a square or rectangle.

I really want to for this piece take that feature into account, so you’ll see from the pictures that the building doesn’t have any right angles in the walls.  I also wanted to have proper roof line for this pieces too.  Unlike all the other buildings that have a roof/floor as a means of finishing off the building, I wanted this one to have a proper roof.  I think I may have been influenced by the old Forge World Anphelion Base (which is no longer available) when I made this.  I must admit it has been something I’ve been thinking about ever since a friend of mine revealed to me he has one, unpainted, basically unassembled and complete that he’s perhaps wanting me to paint…

I digress… So lets look at some pictures.  I took these this morning in a bit of a rush because it was about to start raining (where I live has had over half its yearly rain fall in the past two months) and I wasn’t sure when I’d get an opportunity next to take some photos, so the compositions aren’t red hot, but you’ll get the drift.

forge world realm of battle cityscape primus sector 1

Forge World Realm of Battle Cityscape Primus Sector 2

Forge World Realm of Battle Cityscape Primus Sector 3

Forge World Realm of Battle Cityscape Primus Sector 4

Forge World Realm of Battle Cityscape Primus Sector 5

Forge World Realm of Battle Cityscape Primus Sector 6

Forge World Realm of Battle Cityscape Primus Sector 7

Forge World Realm of Battle Cityscape Primus Sector 8

Forge World Realm of Battle Cityscape Primus Sector 9


I do intend on completing the last two boards however I’m not sure when the next update will be on this project.  I more or less see it now as being finished.  So thank you for taking this journey with me.  It’s been a pleasure having your company, words of encouragement and suggestions, I’ve had a really good time making this board, much more than I thought actually.  It’s been one of the most rewarding things hobby wise I’ve ever done.  I never thought I’d do scenery, but I can see now that it will enhance mine, and my opponents enjoyment of the game so much more by having an interesting, stimulating and challenging battle-space to play on.   Sadly its often an aspect of our hobby that is overlooked or marginalised and it’s my fervent hope that I’ve inspired one or two of you out there to step up and make some scenery that is on par with some of the magnificent armies I see both locally and on the interwebs.

I’d especially like make mention to Aaron over at Forlorn Hope who’s suggestions, ideas, constructive criticism and just general radness has been extremely helpful and inspiring during this project.  Cheers mate.

Speaking of Aaron, he and I will be shortly commencing the Death of Isstvan III Campaign described in the Forge World Horus Heresy Book one : Betrayal.  If anyone who lives locally and would like to participate with either a Traitor or Loyalist force message me.  The plan is to bring you battle reports of the six main Battle Missions, Blood Feud, Fire Tide, Shatter Strike, Onslaught, Dominion & Extermination and also the four Legendary Battles, Cometh The Red Angel, The Flight of Truth, Counter Thrust and The Death of Gods and Angels.  This is going to be EPIC and I can not wait to start getting enough (Loyalist) World Eaters together so the games can commence.

Apart from that, I plan on just having a few games of 40k on this board now its complete and I’m looking forward to seeing what its like to play on.

So… who wants a game?

John

IMG_207501 IMG_207602 IMG_207703 IMG_207804 IMG_208005 IMG_208106 IMG_208207 IMG_208308 IMG_208409 IMG_208510 IMG_208611 IMG_208712 IMG_208813 IMG_208914 IMG_209015 IMG_209116 IMG_209217 IMG_209318 IMG_209419 IMG_209520 IMG_209621 IMG_209722 IMG_209823 IMG_210724 IMG_210825 IMG_210926 IMG_211027

Necrons

$
0
0

There, I said it!

I’ve been wanting do to some painting recently of anything other than Imperium, which I focus on quite heavily… as you can see from the extensive Imperial armies I’ve collected…  So yesterday while I was in my local GW store picking up something for my upcomming 30k World Eaters I grabbed a box of Necron Warriors and thought I’d give them a hit.

I’ve long wanted to paint some Necrons having seen some really interesting looking armies painted up over the years that really capture the idea of “undead” robot warriors in 40k.  Although I don’t play, and don’t ever intend on playing Warhammer Fantasy battle, if I ever did it would have been Undead (or whatever they call them now)  I just like the idea of reanimated skelletons coming for you.  It must be the impression that Jason and the Argonauts (1963 version with the superb stop animation of Ray Harryhausen) or the Evil Dead series of movies left on me when I was much younger.

Whatever the case, I got my undead robot warrior fix and painted this bad boy this morning.  It may be a test mini for a new army, or it might be me just getting something off my chest.  Whatever it is, hope you enjoy it.

Necron Warrior

Necron Warrior 2

Necron Warrior 3

Necron Warrior 4


I have to admit, I’m quite pleased with how the Necron Warrior has turned out.  I really wanted to capture the ancient feel of background the to this army, however I didn’t want to over do it either, especially in the “glowing” department.  I’ve got some good ideas for some of the Necron vehicles too, so who knows maybe we’ll see some more of these in the future.  I actually painted two Necron Warriors however I only photographed this one because well, after you’ve seen one Necron Warrior, you’ve seen them all.  The two didn’t take that long to paint either, it took me a little under 2hrs for the two of them but this didn’t included assembly.

Comments?

Thanks for dropping in, until next time

John


How to paint World Eater Space Marines

$
0
0

Hello everyone!

Its been a while since my last post as I’ve been busy with study, life and just well, I needed to take a bit of a break to recharge my painting mojo…  it came back pretty strong on Wednesday morning and I cracked open the bunker and went on a mini painting bender and smashed out two test models for my up and coming 30k World Eaters.  This is something that I’ve been thinking of for quite some time however for some reason I couldn’t decide in my mind exactly what I wanted to do in terms of how I was going to paint them.  I had a few different ideas for the white actually, and I was torn as to which method I’d ultimately use.

So I just decided to paint one model with each method and compare and contrast the results.  So sit back and I’ll take you though what I did and how I did it blow-by-blow.  Hope you enjoy it.  By the way, if you follow my Facebook page you’ll already have seen the end results, and if you don’t follow my Facebook page, go do it now….  I was actually so pleased with how both models turned out that I posted the pictures up on my Facebook page to show them off.

So here we go….

Let me begin by giving you some idea on where my head was at before I commenced painting these two models.  White is a tricky (tint, its not a colour) to paint and the colour that is under it has a very strong influence on how we perceive it.  The look that I want to achieve with my World Eaters is one that gives the viewer the impression that they have been in, or are in combat.  So lots of grime, dints, dust and grittiness.  However I don’t want them to look like they’ve just been thrown in a washing machine with a couple of bricks either.  Lets face it, Marines would get shot at a lot, firstly because they are generally numerically inferior to their opponent and secondly, it would take a lot of fire power to drop an Astartes.  Achieving this balance is a major technical and aesthetic challenge with white.

This is why I’ve gone for experimenting with two different base colours for the models.  One has a very light grey base colour, and the other has a very light brown base colour.  The light grey model ultimately had its panel lines cut it with a black oil wash, while the light brown model had its panel lines cut in with a dark brown oil wash.  So lets take a look at the stages and I’ll walk you through it.

As some of you who’ve followed my painting updates perviously will know, I’m really big on preparation and batch painting.  I like to create a system and document it when I paint an army so that if and when I revisit it I can reproduce it, and also its a devision of labor idea, where I attempt the use my time when painting an army as economically as possible.  However I like to keep in mind the end result and in painting models fast, I don’t like to compromise the finish either…  So I spend a bit of time preparing models before painting them, so that when I paint I can achieve a standard which I consider slightly above table top standard for my rank and file models.

How to paint World Eater Space Marines 1

So here we have stage one.  The body of the marine built, with its head, arms, backpack, shoulder armour and weapons attached or mounted on tooth picks which are held in place with polystyrene foam.  When I say mounted on what I mean is for items like the arms, backpack, head and weapon I actually drill a 2mm hole in them and just force the tooth pick into the hole.  This saves time glueing them onto the tooth pick and if I bump them and they fall off, I can just re-attach them.  Everything is cleaned up, barrels are drilled and the paint is ready.  I’ve got a clear picture in my mind of what I want the finished model to look like.

How to paint World Eater Space Marines 2

Black undercoat.  Nothing really revolutionary here. How to paint World Eater Space Marines 3

Once the black undercoat is applied I take the pieces that will be getting different treatments and fix them to separate foam plinths.  Here the bolters have been painted with Citadel Leadbelcher.    How to paint World Eater Space Marines 4

Just like the bolters I’ve segregated the shoulder armour and back packs.  One thing that isn’t shown in this picture is that they were actually all aligned to face the same direction they would when on the marine.  This will assist later when it comes time to shading them.  The base for the blue is Citadel Kantor Blue.  Once that had dried, I gave each piece a small highlight with Citadel  Caledor Sky, and then finally a even smaller highlight with 70% Caledor Sky and 30% White Scar.
How to paint World Eater Space Marines 5

The first marine is given his black undercoat a base coat of Citadel Dawnstone.  I didn’t go over board with coverage, as I want the black to remain in recesses etc to add to the  pre-shading of the white when it eventually goes over the top.  How to paint World Eater Space Marines 6

As per the stage above except with Citadel Baneblade Brown.How to paint World Eater Space Marines 7

The first coat of white.  I created a mix of 90% Citadel White Scar and 10% Citadel Dawnstone.  This stage you want to make sure that you apply the colour with a “top down” notion in mind.  Remember that most of the time the source or light (the sun) is above the marine, so we expect to see shadows in areas where shadows would normally be created in natural light.  So lightly dust this mixture on ensuring that you keep the model pointing up as you are painting it.  Don’t go over the top either, just like the Dawnstone, you want to make sure that the coverage isn’t complete, you want some Dawnstone, and if you’ve done the job right, some of the black to still be showing through.

Once that was done, I gave the model a very light coat of just straight White Scar to make the raised areas really pop.  You need to be very delicate with the paint application at this stage otherwise you run the risk of making the white too bright and ruining the effect you were trying to achieve by using the black and grey undercoat.
How to paint World Eater Space Marines 8

As above except with Citadel Baneblade brown.How to paint World Eater Space Marines 9

I then added chipping with a small sponge, painted in the detail and gave the models a coat of gloss varnish in preparation for oil washes.  How to paint World Eater Space Marines 10

I really like this picture for many reasons.  Mainly because it clearly demonstrates the distinct difference between the brown and grey undercoat.  I deliberately chose to use brown and black oil paint respectively on each model to further accentuate the undercoat colour coming through the white and thus further emphasise the two “looks” I was going for.  I actually think the one on the right would be a great base for a Death Guard….

Once i’d finished painting the bases, finishing up the detail etc, I gave each part a good coat of matt varnish, assembled each marine, hit it with some weathering powders and then gave it another hit with matt varnish.  Below are the pictures of the finished models.

OLYMPUS DIGITAL CAMERA

OLYMPUS DIGITAL CAMERA

OLYMPUS DIGITAL CAMERA

I’m really please with the results and very really anxious to get started on the army proper now.  I’ve decided to go with the grey undercoat after all that as I think it give a more authentic white and is in line with how I’d imagine the XII Legion to look.

What are your thoughts?

Thanks for dropping in, comments as always are very welcome.

John


Alternate Space Marine Terminator Storm Shield up for sale

$
0
0

Thats right, you read it correctly, I’m selling something.  We’ll trying to anyways…

Its an idea I’ve been toying with for some time now so I thought I’d put it out there and see what happens.

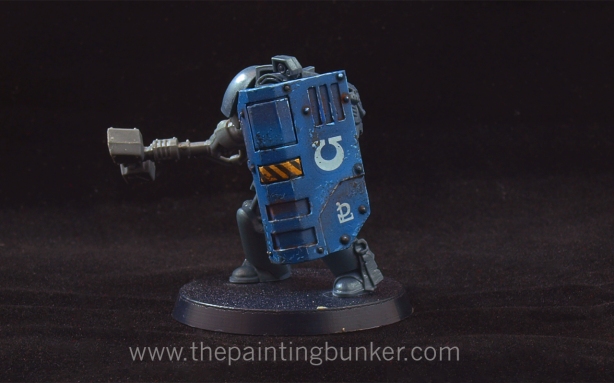
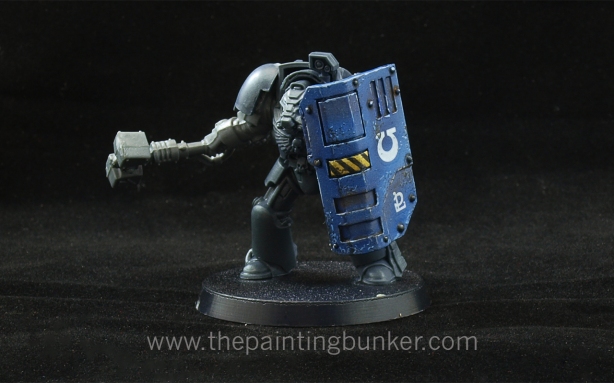
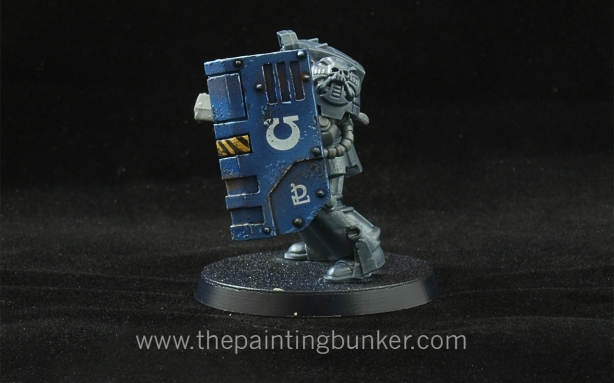
This is an alternate version of the Space Marine Terminator Storm Shield that I made some time ago for my Iron Hands army as I was really unhappy with the ones that come with the plastic kit, so I went about making my own.  I wanted them to still use the same “design language” that the Space Marine range uses so they would fit in but wanted it to look a bit more creditable and solid looking rather than the current one.

So to test the waters I’ve listed 10 packs of 5 on eBay for $12.95AUD each that includes FREE postage within Australia for the first 10 packs sold.

The Games Workshop Terminator model is shown for scale purposes only and isn’t included.

OLYMPUS DIGITAL CAMERA OLYMPUS DIGITAL CAMERA OLYMPUS DIGITAL CAMERA OLYMPUS DIGITAL CAMERAThis is what they look like when they come out of the mold.

So what you get in a pack is 5 unpainted, unassembled polyurethane resin storm shields.  As you can see, some cleaning will be required.

Did I mention FREE POSTAGE for the first 10 sold?

I’ve got a few other ideas for after market accessories in my head, and depending on the success of these will depend on whether or not they see the light of day.  So fingers crossed.

So go to my eBay account and buy a couple so I can pay for my tertiary education and not eat 2 minute noodles all week…

Thanks for dropping in

John


Iron Hands Librarian in Terminator Armour

$
0
0

So I knocked this out this morning in a spurt of painting enthusiasm.  The truth be told, he’s been sitting on my painting table (we’ll in a dust proof box on a shelf next to my painting table) for close to 18 months now.  I’ve had this idea for how I wanted him to look for some time as his original purpose was to be apart of the “Death Knell” Apoc 40k formation for Space Marines.  Basically it consists of 5 x 5 man squads of TH/SS Terminators with a Lysander proxy, a Contemptor Dreadnought in a Lucious droppod and a Librarian in Terminator Armour with a Storm Shield.  It’s a pretty bad ass formation and really puts a dampener on your opponents day when it rocks up.  (To announce its arrival you use a orbital bombardment to “clear” the area where all the Terminators arrive)

For some reason I just never got around to painting him, and then when I finished my new storm shield after re-tooling the pattern from the original I did close to two years ago I got inspired to finish it off.  To be honest, I’m glad I did because its come out much better than I’d expected.  I even tried my hand at doing NMN with an airbrush on the Librarians Force Sword.

As you can see, I removed the models force stave? and replaced it with a massive force sword from the Grey Knight plastic kit I think, and I exchanged his “talk to the hand” hand with a storm shield.  In game terms this seems to be the most popular load out for this type of character when he’s rolling in his Terminator armour.  The pose actually looks quite good, better than I was expecting.

The pictures are not to a standard that I’m completely happy with because I’m having trouble with my camera at the moment and need to sit down and figure out whats going on but I haven’t been bothered to.  So I’ll have to look into it in the next week or so because its really getting on my nerves.  Pro tip, don’t let people fool around with your camera.

OLYMPUS DIGITAL CAMERA OLYMPUS DIGITAL CAMERA Librarian in Terminator Armour 3 OLYMPUS DIGITAL CAMERAOk, thats it for me now.  It’s coming up to Easter and over the holidays myself and Aaron from Forlorn Hope will be getting together for some hardcore, ungreased, man dollie action and taking the Cityscape board out for its madien voyage.  The plan is to have a 1950 point game on it with my Carcharodons V his Tyranids or Death Korps of Krieg (or both on separate occasions)  So my intention is to bring you a full battle report detailing blow by blow action with pictures accompanying that will melt your brain.  I’m really looking forward to this and it should be a lot of fun.

Until then, thanks for dropping in

John


How to paint Space Marine faces

$
0
0

So ever since I did the post on How to paint World Eater Space Marines I have a lot of positive feed back, in fact its been a very popular post.  One question that I’ve continually had was “how did you paint the face?” So I thought I’d do a quick tutorial on how to paint faces to a good table top standard.  Believe it or not, its not that hard and with a little patience and practice you’ll dramatically improve the presentiment of any miniature where flesh tones are present.

So lets take a look at the process.

OLYMPUS DIGITAL CAMERA


Step 1.

For the tutorial I’ll be using the old Citadel range of paints.  I do like the new range, however I’m buying to replace them with the new ones as I go so I’ve still got a fair few of the old range on hand.  But if you use the Citadel conversion chart if you don’t have any of the old paints you should be golden.

The paints & materials I’ve used are

  • Abaddon Black – Undercoat and detail
  • Tallarn Flesh – Base coat and component for highlights
  • Dwarf Flesh – For highlighting
  • Red Gore – A component colour for the lips
  • Ogryn Flesh – Base coat wash
  • Devlen Mud – Shading
  • White Scar – Eyes etc
  • W & N No 1 Brush
  • Marines Head – I like mounting pieces on tooth pics for ease of handling

OLYMPUS DIGITAL CAMERA


Step 2.  Undercoat

I’ve used Abaddon Black applied with an Air Brush, or use a spray can.  This is important and many of the small details on the face can be erased or compromised if you don’t apply the paint thinly enough.  I’m not saying it can’t be done with a brush, but it just makes your job harder if you do.

OLYMPUS DIGITAL CAMERA

Step 3.  Base coat

Again I’ve applied Tallarn Flesh with an air brush for the same reason that I applied Abaddon Black with an air brush, so as not to compromise any of the fine detail on the face.

OLYMPUS DIGITAL CAMERA

Step 4.  Wash

Using my W & N no 1 brush I applied a liberal amount of wash.  Don’t be scared to do this as you’ll find that when the medium dries (evaporates) all that will be left is the pigment in the recesses.  You want that to create definition.
How to paint Space Marine Faces 5

Step 5.  Re-apply the base coat

This is where you need to be mindful of a few things.  The first one is paint viscosity, and the second one is your brush condition.  Let me explain.  Where a lot of people fall down when painting flesh is that the paint has already started to dry when its being applied.  This makes the paint lumpy and has an inconsistent appearance in its application.  In some climates where the air is dry (< 30% humidity) you may need to use a wet pallet.  Or just do what I do and take a blob of paint out of the bottle (I live in a humid climate), put it on my pallet and mix in a bit of paint thinner.  This is really important, especially for skin tones, the reason is that our skin is sort of translucent and when we paint it to re-create that effect, we need to simulate this and the best way to do that is to make the paint thin.  I’ll get into more detail on this later, but for now, just make sure that your paint it thinned down a little so it flows better.

The second point you need to be aware of is your brush condition.  There are two aspects of this, the first is that your brush is set up to facilitate capillary action, and the second one is that the tip of the brush is the right shape.  Many painters don’t use their brush the way its meant to be used, and that is having a nice amount of paint on the whole brush (bristles) and then shape the brush tip so that it makes a nice fine point for painting.  A lot of guys I see dip the tip of their brush in the paint and use only that part.  This seriously limits the full capability of the brush and you are doing yourself a big disservice.  To help your brush facilitate capillary action, just make sure that before you dip it in paint (thinned down I hope) that you first dip your paint brush in some clean paint thinners first.  Remove the excess with a tissue or something then dip the paint brush in your thinned paint, using the same tissue shape the bristles so that you have a nice point.

You can now pick out the raised areas of the face with the Tallarn Flesh.  Before you do this take a few moments to consider where you’d like the paint to go by studying the face and its contours.  By having a plan of where you’d like the paint to do will dramatically improve your results.

OLYMPUS DIGITAL CAMERA

Step 6.  First Highlight

Mixing about 70% Tallarn Flesh with 30% Dwarf Flesh, begin highlighting the areas of the face that would naturally catch the light.  So areas like the ears, nose, chin, cheeks, brow.  Again, make sure you follow the points I make in Step 5 about paint viscosity and having your brush set up properly.  Paint viscosity is important for the next three stages.  As I mentioned before, skin is sort of translucent, so when you paint flesh tones, try and make your paint go on in very thin layers so that the edge of each layer of paint isn’t too contrasted against the previous one, and allows its colour to be blended with the previous colour that was applied.

How to paint Space Marine Faces 7

Step 7.  Second Highlight

Mixing about 30% Tallarn Flesh with 70% Dwarf Flesh, begin refining the highlighting of the previous areas of the face that you worked on in Step 6. Again, make sure you follow the points I make in Step 5 about paint viscosity and having your brush set up properly.

OLYMPUS DIGITAL CAMERA

Step 8.  Final Highlight

With straight Dwarf Flesh go and pick out the final areas where you want attention to be drawn to.  Tip of the nose, ears, brow and top of the cheeks.

How to paint Space Marine Faces 9

Step 9.  Lips

With a a mixture of about 60% Tallarn Flesh, and 40% Red Gore, apply a small amount to the lower lip.  This is very subtle but crucial to achieving a more realistic effect.

OLYMPUS DIGITAL CAMERA

Step 10.  Eye Shading

Place a small amount of Devlan Mud in each of the eye areas and a small amount under the bottom lip.  Again a subtle but crucial step.

OLYMPUS DIGITAL CAMERA

Step 11.  Pick out Details

Paint the actual eyes black in readiness for the white to be applied, paint around the collar, neck brace etc and the small stud on his forehead.  Highlight the collar etc as you would normally.
OLYMPUS DIGITAL CAMERA

Step 12.  Finished

Paint in the eyes with white, followed by a small dot of back.  This may take several attempts to get right.  Pick out the service stud with your choice of silver and finish up any other details you’d like attention paid to.
OLYMPUS DIGITAL CAMERAOLYMPUS DIGITAL CAMERA

So there you have it.  It’s doubtful that you’ll win a Golden Daemon trophy with this scheme, but it will with any luck improve the quality of your table top miniatures.

A few points to remember about painting flesh.  The first is no matter what tone of flesh you are wanting to achieve, always start with a warm flesh tone.  For example, if you look at the picture below of my Iron Hands Librarian, you’ll see he’s quite pale.  I still used Tallarn Flesh as the base colour, I just used a mixture of grey and bone to dull down the warmth of Tallarn Flesh.  This is a convention to be mindful of when painting flesh tones.  It seems that our eye is programmed to see flesh tones in a certain way and we accept simulations of flesh tones better when they have a warm base to start with.

Iron Hands Librarian

Thats me for now.  Hope you’ve found this helpful, and until next time chat later.

John


Forge World Realm of Battle Cityscape Board on Display at Anzac Cup this weekend

$
0
0

This weekend at RAAF Base Amberly will see the annual Anzac Cup hosted by WW40k being held.  Its a 1950pt Warhammer 40,000 6th Ed tournament,  more details can be found here.  I’m playing with my Carcharodons and I’m looking forward to participating as the team who ran the ADFWGA Championships are behind this event, and if their last tournament was anything to go by it should be an awesome weekend.

The organiser of the event has asked me to bring along my Forge World Realm of Battle Cityscape board to have set up for display as well as some of my other models, including my Titans and a few others pieces from my collection.  So if you are able to drop in on the Saturday or Sunday and have a look it would be great to have your company.  As usual there will be a strong fund raising focus for Legacy over the weekend so if you can a small donation would be greatly appreciated by families of serving and past Defence Force Personnel.

Entry is free and there will surly be some amazingly painted armies battling it out over arguably the best tournament scenery in Australia for the Anzac Cup.  I’m sure its going to be a great weekend.

If you click on this LINK it will take you to the Google map for RAAF Base Amberly’s location if you are not familiar with the area.  Also below is a picture of where the event is being held on the Base.  The good thing is that you won’t need a Military ID to get in as the tournament isn’t being held in the secure area, so there will be no hassles for you coming along.  The only stipulation is that you cant wear thongs (flip flops for my American readers, incase you think Aussies walk around wearing G-Strings everywhere)

563593_10151377024397219_407639634_n

So it’d be great to see you along over the weekend and I’m sure you’ll be impressed with what you’ll see.  If you are not able to make it along, you’ll be able to live vicariously through my post tournament review that will surly follow next week sometime.

Hope to see you then, thanks for dropping in

John


How to strip paint off resin models

$
0
0

A few weeks ago over Easter I had a few of my Wargaming mates over for a couple of days of hardcore man dollie action, drinking beer and BBQ’s. For those of you who follow my FB page you may remember me commenting on what a superb miniature Inquisitor Hector Rex is. I’ve had this guy in my collection for some time as I’ve always wanted to paint him simply because its an amazing sculpt. If you haven’t seen it close up, do yourself a favour and find one, he’s pretty amazing.

Well, while I had some of my friends over we were taking about models we’d like to paint etc and I mentioned how I’d really like to do a diorama that features Inquisitor Rex fighting the FW greater Daemon of Khorn. I can’t say for certain, but it actually looks like the minis were sculpted to be positioned with one another.

This is the model incase you are not familiar with it

20130423-174622.jpg

Anyway, amazingly one of my friends mentions to me that he has one, that’s been assembled and under coated but he doesn’t intend on ever painting it so he asked me if I’d like to have it, for FREE! I was pretty overwhelmed by his generosity and after being assured by him that he didn’t want anything for it other than me doing a kick ass paint job in it, I accepted. So he brought it round the next day and I could see that I had a big job ahead if me getting it disassembled and cleaned up ready to be painted.

Now, the model wasn’t particularly well put together and never having had seen one before unassembled I wasn’t sure where it came apart. It had also lots and lots of green stuff in the joints too that was going to have to be removed.

Not having removed paint from resin models ever I had to do some research on what methods to use etc, as I didn’t want to damage the resin. There seemed to be two schools of thought on the subject.

1. Simply green commercial floor cleaner
2. Dettol

Now being a fairly practical guy that’s prone to taking the path of least resistance I took the dettol option. I brought the biggest one I could find in the super market, for 750ml it cost me $10. I later found out that simply green is $20 for the smallest quantity I could find which was 5L.

Here’s the stuff.

20130423-175606.jpg

So I rushed it home, got a 10L bucket poured my Dettol in along with some water 20/80 dropped the blood thruster in and sat back….

I came back about 3 hrs later and pulled out a random part and with my trusty tooth brush began scrubbing. Much to my surprise the paint had turned into this oily solution that was extremely hard to get off not only my brush, but my hands and worst of all, the model. I could see that it was working but it was not coming off at all. I even tried using a detergent and warm water, but still no dice. So far blood thruster 1. John 0.

So I put my thinking cap on and did some research. Found out some interesting things. Firstly, the main ingredient in Dettol is a substance called chloroxylenol and that several of the other ingredients in Dettol are not insoluble in water. This is why when you add water to Dettol it goes a white coloured and milky. The other thing I found is that Dettol contains isopropanol. To cut a very long story short, isopropanol will actually dissolve many forms of plastic, but I suspect that because its in such a small quantity it only removes the paint, not dissolve the resin. But I’m not a chemist so I can’t say conclusively. I also can not say conclusively if it is the active ingredient in Dettol that actually stripped the paint, but do know after doing my research that if I use alcohol I’ll be able to remove the oily residue.

Enter diggers metholated spirits

20130423-182945.jpg

This stuff worked a treat on getting the oily residue off and had the greater daemon clean in no time. I couldn’t believe how clean it all came up.  All I used the metho for was simply rinsing off the model.  I didn’t actually soak the parts in metho, just used it to “wash” the parts.  Overall I’m pretty pleased with the results. As an added benefit the green stuff weakened after being soaked in the Dettol and the model came apart very easily. I still hand to do a fair bit of gentle scraping etc to get the last fragments off, but everything came apart really easily and it now looks like this

20130423-183306.jpg

Great success!

So it turns out there were one or two pieces missing but nothing too dramatic. I plan on remaking these then begin reassembling the blood thruster and get him ready to paint. It’s going to look amazing.

Got a few interesting projects in the pipe line ATM and I can’t wait to get them started but unfortunately I’ve got Uni so that’s where my focus had to be for most of the time. I’ve also had a few people ask me about the battle report I promised. Well, the battle did happen, but due to having my judgement impaired from a little too much alcohol no photos got taken. However come June/July the bunker will be back open for business and I’m sure you’ll see plenty of hardcore man dollie action coming at you!

Until then,

Thanks for dropping in

John


Forge World Greater Daemon of Khorne WIP #1

$
0
0

I haven’t really done that many posts on this blog that are actually a work in progress post.  Since moving from forums to my own blog I’ve mostly just brought you either finished projects or tutorials.  So I thought I’d mix things up a bit and bring you a series of posts around my new Forge World Greater Daemon of Khorne.  If you read my previous post you’d know that a good friend of mine actually gave me this model after he’d had if for a year or two and didn’t think he’d ever get to painting it.  Obviously I accepted his extreme generosity and ever since have been thinking through various ways I might approach painting this epic bad guy.  And a bad ass he is, make no mistake.  This is one seriously amazing sculpt and its a real pleasure studying the detail on it.  I really admire the talent and years of honing skill that it would take to produce something like this.

So lets get into it shall we?

As with any model this size (or indeed any model for that matter) preparation and having a plan are essential.  In terms of preparation ensure that the model is going to fit together properly, be sturdy and have no gaps etc.  In terms of a plan, how is it going to be painted?, whats the base going to look like?, are you going to paint it in pieces or as an assembled model?  Many of these questions need to be considered and answered clearly before you embark on a project.

For this model, I actually plan on using it in my upcoming World Eaters army for when I feel like running them as CSM, so it seems appropriate to have a Greater Daemon and also a few Blood Letters for good measure.

Apart from that, preparation is the next aspect to be considered.  Being such a massive model (its huge) I want to ensure that I’m not relying on simply super glue to keep the model together nor the simple joints that Forge World have created for the model.  Having strong bonds along key stress points is an important consideration with models like this.

Forgeworld Greater Daemon of Khorn WIP 1


So for all of the main joints on this kit, which are the left hip, both wrist joints, hips and wings, I have used 2mm spring steel to add that extra degree of support that I know I’ll be grateful for after I’ve used that bad ass in a few games.  Forgeworld Greater Daemon of Khorn WIP 2

No to rely totally on the strength of the steel, I also like to drill additional “key” holes.  What this does is allows the epoxy resin that I use to bond the pieces together to seep into the holes and assist with strengthening the mechanical bond of the pieces.  Forgeworld Greater Daemon of Khorn WIP 3

For this model I’m actually magnetising it to its base.  Why you ask?  Well its for two reasons, the first is to facilitate with painting and the second is a secret that you’ll just have to wait and see.  One aspect of this model that I’m not entirely happy with is the models attention to something thats in its immediate foreground.  Its so stooped over that its almost looking at its feet.  As I’ve mentioned before, I suspect but don’t know for certain that this model was sculpted to be posed with Hector Rex.  Hence why its appears to have its attention focused on something about man sized more or less at its feet.  I wanted to overcome this to a degree so that someone looking at the model can get a better look at the detail of the models front.  So I used cork floor tiles to “jack up” the front left foot, while keeping the back foot at normal base level.  It’s just a subtle thing, but as you’ll see it makes a massive difference in how the model now interacts with its audience.
Forgeworld Greater Daemon of Khorn WIP 4

Just getting the pose right.  Forgeworld Greater Daemon of Khorn WIP 5

So detail of the base.  I want it to look like a hellish battle field.  Only the most nightmarish of battle fields would enable a daemon of this stature be summoned.  Note the crushed Space MarineForgeworld Greater Daemon of Khorn WIP 6

A better view of the base.  I used a lot of different materials on this base, cork floor tiles, train set ballast, skulls and ceramic bricks from Secret Weapon Miniatures and as you’ll see in other pictures, Forge World brass etched barbed wire and an Imperial Eagle.

Forgeworld Greater Daemon of Khorn WIP 7

When it comes to glueing this pieces together I like to use small cramps to ensure that a strong bond it made.  Its a bit of an involved process but the results speak for themselves.Forgeworld Greater Daemon of Khorn WIP 8

Yeah, complicated.  Forgeworld Greater Daemon of Khorn WIP 9

Some of the base detail, almost complete.Forgeworld Greater Daemon of Khorn WIP 10

Just another detail shot.Forgeworld Greater Daemon of Khorn WIP 11

The base now with added barbed wire and the Greater Daemon stepping on a damaged Imperial EagleForgeworld Greater Daemon of Khorn WIP 12

A clearing image of the finished baseForgeworld Greater Daemon of Khorn WIP 13

This shot was taken just prior to undercoating.  As I mentioned there were a few pieces missing from the model so I had to make a few molds of those pieces today and then cast them up, if you look very closely you can see where they are as they’re white resin.  Forgeworld Greater Daemon of Khorn WIP 14Ok, thats me for the time being.  Hope you enjoyed this WIP post.  I think I might make it a bit more of a habit in the future.

Comments always welcome, and thanks for dropping in

John


Forge World Bloodthirster Greater Daemon of Khorne WIP #2

$
0
0

Hey there, been a while between posts these days however I keep forging ahead spending what spare time I have at the moment on chipping away at my current project, the Forge World Bloodthirster Greater Daemon of Khorne.  What a magnificent miniature it is too, I don’t know about you but I find that my appreciation of a mini deepens when I begin to paint it, I find that I really start to look at a mini properly as I’m painting it and the more time I spend painting this mini, the more I really recognise just what an amazing figure this is.

Daniel Cockersell, in the unlikely event you are reading this post, thank you for giving us such an amazing model.  This Bloodthirster Greater Daemon really captures the violence, blind rage, power and brutality of this Chaos Power.

So the WIP pictures.  First up is the base.  Forge World Bloodthirster of Khorne 1

I’m very pleased with how the base has turned out.  This base is really a test pilot for how I intend on doing the bases for my up coming 30k World Eaters army.  Indeed, this Greater Daemon of Khorne along with about 20 plastic Blood Letters are going to be an allied contingent for when I use the 30k World Eaters for games of 40k, when they of course will be Chaos Space Marines.   Forge World Bloodthirster of Khorne 2

The mangled up Ultra Marine.  I sort of saw this guy as having been flicked aside by the Bloodthirster and then crushed beneath a massive piece of masonry or something as the Bloodthirster advances.Forge World Bloodthirster of Khorne 3

A better shot.  I was a bit reluctant to put blood on the model, as I’ve often felt that it cheapens the look of a mini because its such a hard effect to reproduce in scale.  However I gave it a shot using various oil paints and I’m pretty happy with the final effect.  Forge World Bloodthirster of Khorne 4Who’s that handsome devil?  The skin is going to take a long time on this model to get looking right.  I spent probably 3hrs on this face yesterday and its still going.  Overall I’m happy with how it looks but there are still some small areas that I want to revisit.  For those interested I’ve used oils, acrylics, inks and washes on this guy so far.  Also, the finish hasn’t been sealed yet either, so thats why it looks a little shiny.

The wings have also been finished too however they are not that interesting so I didn’t bother photographing them, suffice to say though they are massive and when this model is complete its going to be gigantic.

Ok, thats it for me now.  I’ve got a bit of time off coming up in a few weeks where I intend on hitting this pretty hard, then moving on to the World Eaters.  I’m going to be doing a separate post on the World Eaters shortly, I actually had the 5000pt army rock up on my door step a week or two ago.  I wanted to take a photo of me swimming in all the resin crack for you all, however my good sense got the better of me.  So you’ll be seeing a far more measured diary starting up for my World Eaters shortly.

As usual comments are always welcome and thanks for dropping in.

Until next time,

John


Review – Figure Painter Magazine, Issue # 1

$
0
0

So a few days ago I stumbled across a new publisher called Pigeon Publishing.  They have just started what appears to be their first publication called “Figure Painter Magazine”  From their website they describe themselves as…

Figure Painter Magazine is a new independent magazine dedicated to sculpting, painting, displaying, collecting and gaming with miniature figures from all genre’s. The magazine will have details on new releases, reviews, interviews with the industries top painters and sculptors, show reports, tutorials and a user gallery so feel free to upload you miniature images for submission and the best new image each month will receive a free resin plinth courtesy of Model Display Products.”

I have to say, I’m extremely impressed with this magazine.  Not only is its production standard very high, but the content is first class too.  What I like about it the most is that it offers a very unbiased perspective on our hobby and thoroughly covers many of the aspects associated with the hobby too, from painting, to sculpting and also has ads from suppliers that you may not hear about unless you are a hardcore painter yourself.

I often find myself looking for interesting publications that will help me become a better quality painter and grow my skill set.  When I saw this one I immediately recognised its value.  So lets take a quick look at this 56 page maiden publication from Pigeon Publishing.

FPM 1

This is the cover art work which features a model painted by Polish painter Karol Rudyk, Golden Daemon & Slayer Sword winner amongst many other places at prestigious painting competitions.  There is also a very interesting interview with him as their feature article.  As the name of their interview series suggest, it offers some very interesting insights into how elite painters approach their subjects and some fascinating points of view on the hobby.  FPM 2

The contents page.  As you can see, the topics covered are diverse and stimulating.  Something for everyone.  FPM 3

The first issue also features a comprehensive 4 page review of the Star Wars X-Wing miniatures game.  Although I have not played it myself, I know plenty of friends that are quite into it and this review certainly highlights why its become such a popular game so quickly.  FPM 4Another interesting article is a review of various modelling shows in the UK such as Salute, Forgeworld open day and various IPMS events.  I really like this as it offers readers the ability to see how other modelling enthusiasts do business.  I’m a really big believer in looking outside your chosen corner of modelling and seeing how others apply technics and achieve effects to give you a more rounded and balanced approach to modelling.  Articles like these give readers who may only paint figurines the opportunity to explore how say, WWI Bi-Plane modellers detail their planes wing rigging to achieve a realistic effect.  This technique may then be applied to figurines bringing a new technique and take the hobby to a new level.  It also exposes readers to events that they may never have heard of before that they can visit.

So to wrap up, this is a great ePub (its only available for digital download) and the first issue is 1 British Pound ($1.66 AUD), its 56 pages of high quality content and deserves your support, so rock over to www.figurepaintermagazine.co.uk and grab a copy and head over to their Facebook page and throw them a like

Thanks for dropping in

John


Forge World Blood Thirster of Khorne – Finished!

$
0
0


So yesterday I went on a bit of a painting bender and finished this bad boy off, the Forge World Greater Daemon of Khorne.  I am very pleased with the final results.  As I’ve mentioned in previous posts, its an amazing miniature and was a real pleasure to paint.  It also stretched me as a painter which I enjoyed.  Painting Space Marines all the time can become a little tedious and cause your style to stagnate somewhat.  So anyway, enough yakidy yak

Behold!

An’Ggrath the Unbound
Blood Thrister 1 Blood Thrister 2 Blood Thrister 4 Blood Thrister 5 Blood Thrister 6 Blood Thrister 8 Blood Thrister 9 Blood Thrister 10Was that as good for you as it was for me?

Thanks for dropping in…

Next up something for my Iron Hands I think…

Comments always welcome

John


Next project announced – The XII Legion – World Eaters

$
0
0

Well, its been a long time coming but I finally got around to it.  I’ve started painting my 30k World Eaters army.  Bit late maybe, but who cares, they’re going to be bad ass.  I’ve actually been quite busy this last week or two with painting and modelling however I’ve been so focused on painting and modelling I’ve neglected to do any posts.  Plus the weather has been seriously crap here in Brisbane this last week so the light hasn’t been very conducive to taking good quality photos.  I did manage to get some pictures of my finished squad of 10 Blood Letters of Khorne and my Iron Hands Storm Eagle, however I had the wrong exposure setting on my camera and the pics turned out seriously crap.  So once the light improves here I’ll do up a post each for those two completed projects.

Anyway…  Back to the XII Legion.  So this is a pretty ambitious project for me, however instead of tackling it all in one hit, I’ve broken it down into smaller pieces to make it a bit more manageable.  I’ve actually gone and purchased over 5000pts worth of resin crack for the army, however I’m not going to attempt to paint them all at once…. I did think about it though… Plus, I’d like to enter Armies on Parade (September 28 in Australia) this year too and I figured having another Horus Heresy era army in the competition wouldn’t hurt…

Moving right along, the first lot of units on the painting table for the World Eaters are:

1.  Angron (of course),

2.  Terminator Squad,

3.  Rampager Squad,

4.  Legion Heavy Support Squad,

5.  Spartan Assault Tank (pimp mobile for the Terminators),

6.  Storm Eagle Gunship, and

7.  Contemptor Dreadnought

Heres what all that looks like in a box after I cut off all the tabs, pour point etc incase you’re wondering….

IMG_262401

So lets take a look at these units shall we…  By the way, the pics are pretty poor quality so please bear with me

Angron

Can I just say this model is amazing.  I know its been done to death on the interwebs but I just have to have a chop at it too (pardon the pun).  The detail is astonishing and Simon Egan well and truly exceeded everyones expectations with this model.  I won’t bang on too much about it but I’m seriously looking forward to painting this model.

IMG_265229

Terminator Squad

I knew very early on I wanted the squad sergeant to be based on the Tyberos model of Carcharodon fame.  This was for several reasons, the first is I really like the stance of this mini, and secondly, it has no Imperial Eagle on the breast plate.  As you may know, only the Emperors Children were allowed to have the Aquila on their breast plate, and the final reason is I like the studs on the armour and its baroque look, and well… its just a cool model and its character really suits that of the World Eaters.

This opened up an interesting can of worms for me as the terminator models I wanted to use for the actual squad are the Tartaros pattern terminator squad.  When I purchased these models, the Legion Tartaros pattern squad were not available so I had the armour I wanted, but the torsos were festooned with Aquila’s and the legs had no studs on them.  I also had a bunch of left over Tyberos models from when I did my Carcharodon army a year or two ago.  So I decided to go and make the torso from the Tyberos model the torso for the Tartaros squad. This required a fair bit of cutting, drilling and chopping but I got their in the end.  I also added studs to the legs and power fists of the models.  I’m pretty happy with the overall result.  Here are some pics, and also I’ll included a thumb nail gallery of the progress shots I take with my phone as I’m going along.  As I’ve mentioned previously I do these mostly for myself so I can remember how to I did something if I need to go back to it at some point in the future so they are not the most wonderfully framed shots.

I really like the squad sergeant (the whole squad will have the same should pads too)


IMG_265027


The squad preped and ready for undercoating

IMG_265128

IMG_262502 IMG_262603 IMG_262704 IMG_262805 IMG_262906 IMG_263007 IMG_263310 IMG_263411 IMG_263512 IMG_263613 IMG_265027 IMG_265128

Rampager Squad

These bad boys are the blood thirsty crazy psychopaths that have had the Butchers Nails implants. I guess they eventually went on to become Khorne Berzerkers… seems to fit.  I tried to have as many Chain Axe variants as I could for this squad and I made the squad leader out of an actual Rampager with a massive two handed Chain Axe.  I actually see these guys more as a Legion Tactical Squad that have just swapped their Bolters for Chain Weapons and Bolt pistols as opposed to a real Rampager squad, but for the sake of this post, lets just call them Rampagers.  I made sure they are all shod in MKII armour, which the XII Legion favoured.

IMG_266743

Legion Heavy support squad

The army needs someone to do the heavy lifting, so I thought some heavy weapons would be a good idea at this point.  So I threw in some plasma cannons.

IMG_266138

Spartan

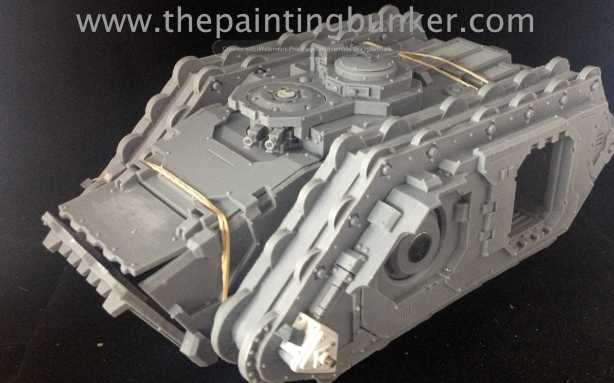
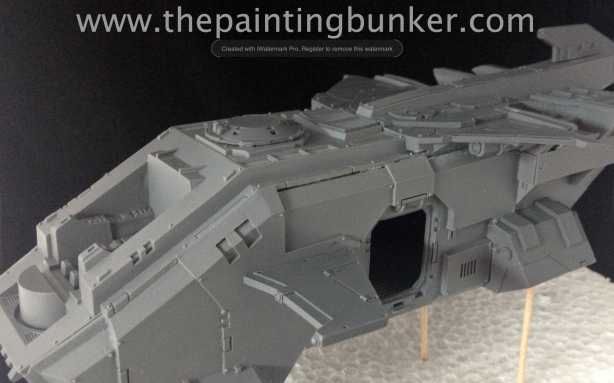
This is one seriously bad ass tank.  If you haven’t read the Betrayal rule book yet, you may not know that in 30k these tanks were hard hitting, teeth pulling mo fo’s.  With a few upgrades they are practically indestructible, easily capable of delivering up to 12 Terminators to the enemies door step to wreak havoc whist along the way delivering hammer blows to the enemy.  So I decided to go balls out with this bad boy and stick practically every upgrade you can put on a Spartan on this model.  One in particular that I’ve wanted to do on a Landraider for some time is a dozer blade so this was a good opportunity to give it a shot.  This is perhaps what I am most proud of on this model, I hope it turns out ok once its all painted.  I intend on painting the interior of this model so the hull isn’t assembled yet. A few other obvious upgrades I’ve added to this model are a remote weapons platform for the multi melta and HK missile, frag assault launchers and track upgrades.  Behold

IMG_267550

The dozer bladeIMG_264926

Track upgrade

IMG_266642

IMG_263108 IMG_267449 IMG_267247 IMG_267046 IMG_266945 IMG_266642 IMG_266541 IMG_266440 IMG_266339 IMG_264926 IMG_264825 IMG_264724 IMG_264623 IMG_264219 IMG_264320 IMG_264421 IMG_264522 IMG_264118 IMG_264017 IMG_263916 IMG_263815 IMG_263714 IMG_263209

Storm Eagle Gunship

Just cos they’re cool (that gap in the hulls been filled by the way)

IMG_267348

Assembling this kit is a real punish…

IMG_266844

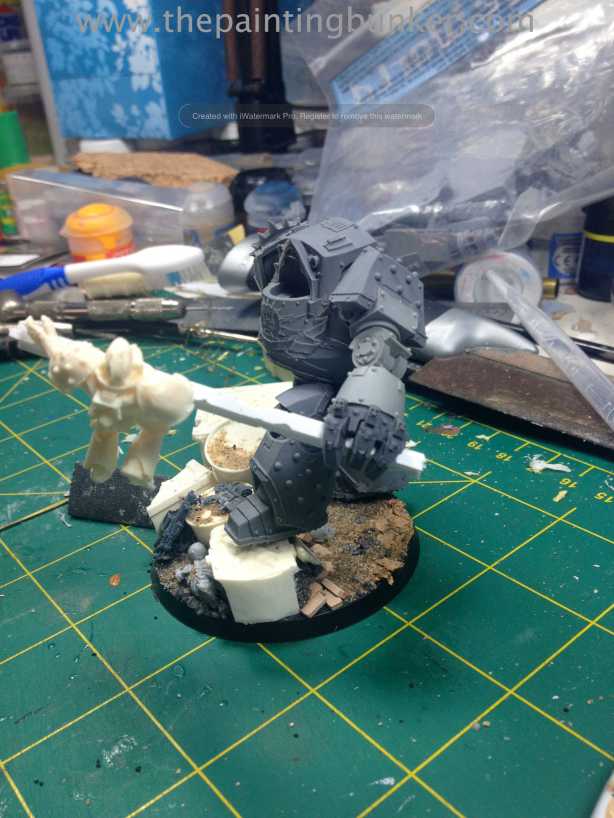
Finally…  The Contemptor Dreadnought

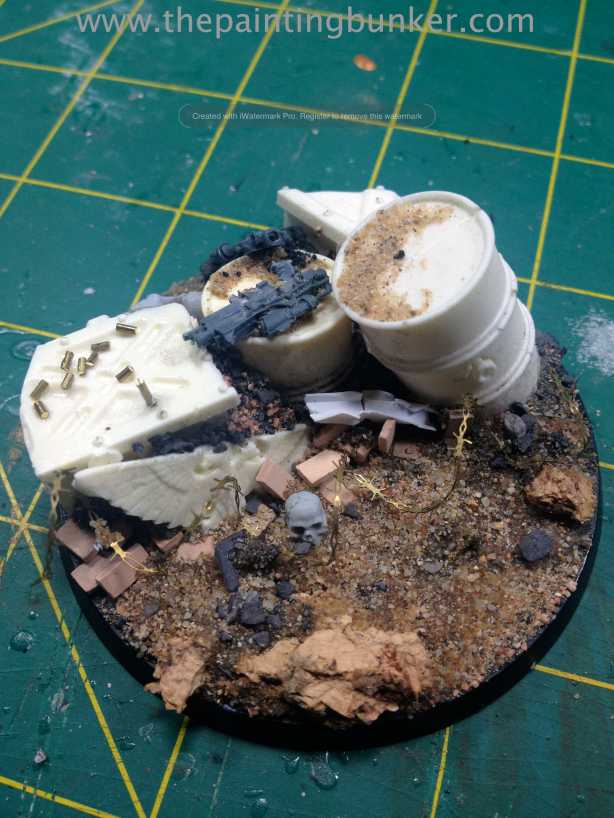
So I’ve had this idea for a Contemptor for some time now that involves said Contempotor back handing a marine across the battlefield with a massive iron bar.  Yep, brutal.  It was sort of inspired by the cover of the Black Library Book Betrayer.  I wanted the base to tell a small story too…  So basically the dreadnought has been swatting marines with a random I beam that he’s found somewhere along the way.  A marine is behind some make-shift battlefield barricade frantically trying to hold off the assaulting force, and this dreadnought has just rocked up under fire and smacked this marine with massive I beam out from behind his cover.  You can see on the base spent bolter casings and an unloaded bolter on one of the drums.

IMG_265734


IMG_265633IMG_265936

IMG_266037 IMG_265936 IMG_265835 IMG_265431 IMG_265532 IMG_265633 IMG_265734 IMG_265330

Thats it for now.  Thanks for dropping in, hope you’ve gotten something from this post.  As usual, comments welcome.

Until next time

John


Finished! – World Eaters Spartan Assault Tank

$
0
0

So… this has been a long time coming and now that I’m finished with it, I can say with certainty that it was worth the wait.  Its a great kit by Forge World.  I think I’ll just let the pictures do the talking on this one…World Eater Spartan Assault Tank 1 World Eater Spartan Assault Tank 2 World Eater Spartan Assault Tank 3 World Eater Spartan Assault Tank 4 World Eater Spartan Assault Tank 5 World Eater Spartan Assault Tank 6 World Eater Spartan Assault Tank 7These are the track links that I made for this kit as I wanted to add a little more detail to them than what comes stock.  If there is enough interest, I may actually produce them for sale similar to what I did with the Storm Shield.  Just a quick point about them, is that I’ve run very coarse sand paper over them to give them a used look, they are quite detailed if thats not your thing.  So flick me an email or leave a comment if its something you think you’d be interesting in seeing available for purchase.

If you look in the progress shot gallery you’ll se clearer images of what they look like fresh

2 3 4 5 6 7 8 9 10 11 12 13 14 15 16 17 18 19 20 21 image image1 image2

Thanks for dropping in

John


Finished! Blood Letters of Khorne

$
0
0


This is just a quick post of the Blood Letters of Khorne I finished some time ago but because of a few things (crappy weather mostly) I haven’t had the opportunity to photograph them properly.  I did these to accompany my Blood Thirster, Greater Daemon of Khorne for when I feel like running my 30k World Eaters as Chaos Space Marines.  Over all I’m very pleased with how these models have turned out.  What I like most about them, apart from being plastic, is that they hark back to the original Slaves to Darkness Blood Letters from 1st edition 40k.  I never liked the pump up gym junkie looking Blood Letters that came out circa 3rd ed.  Its astonishing to think these are plastic as the detail and “organic” look to them is very impressive.
Blood Letters of Khorne 1

Blood Letters of Khorne 2

Blood Letters of Khorne 3

Blood Letters of Khorne 4Thanks for dropping in.  Comments welcome

John


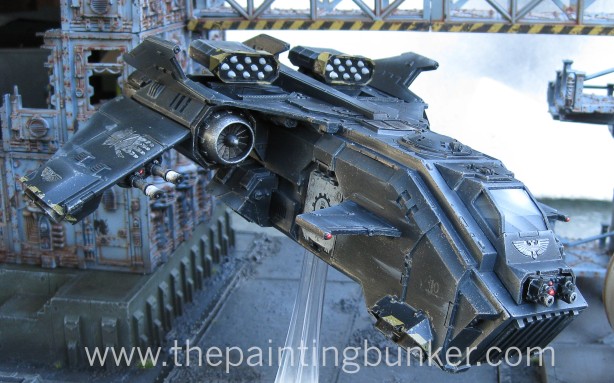
Finished! – Iron Hands Storm Eagle

$
0
0

Just another very quick post of a recently finished project that I’ve not had the time to photograph properly.  I really like this model, and its also great in the game too, however it has been taken down by a few very lucky shots in the few games that I have used it….

This model is often criticised for being difficult to assemble. I didn’t really have any dramas putting it together personally it just takes a little patience and a heat gun on hand as you are gluing it together.  I’ve now assembled two of these and I’m very happy with how they’ve both turned out.

I’m anxiously awaiting the release of the next book from Forge World detailing the Istvaan V Massacre…

Iron Hands Stome Eagle 1 Iron Hands Stome Eagle 2 Iron Hands Stome Eagle 3 Iron Hands Stome Eagle 4


Finished ! – World Eaters Terminator Squad

$
0
0

I finished these a few days ago, however I’ve been pretty focused on painting these last few days and wanted to finished of another unit before I took some time out to photograph them both at the same time.  You’ll have to wait until the next post to see what else is finished, but for the time being here are the Terminators.

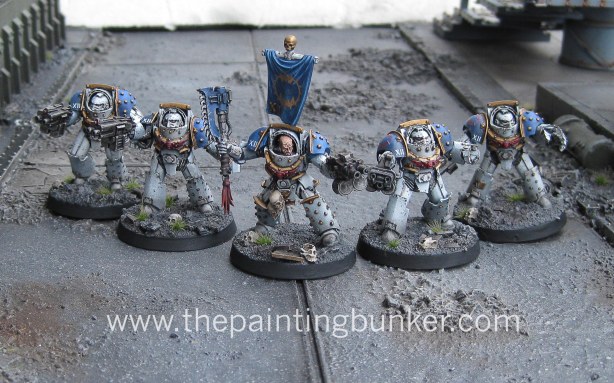
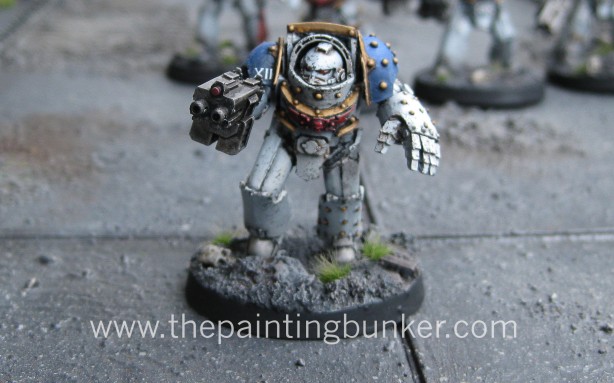
I’m particularly pleased with how these Terminators have turned out, I’m glad I took the time to modify Tyberous’s torso armour for each of the Terminators.  The ‘lightning bolt’ really fits in with the armies look and is very consistent with other World Eater models in the Forge World range.

The pictures

World Eaters Terminator Squad 1 World Eaters Terminator Squad 2 World Eaters Terminator Squad 3 World Eaters Terminator Squad 4 World Eaters Terminator Squad 5 World Eaters Terminator Squad 6 World Eaters Terminator Squad 7Thanks for dropping in

John


Viewing all 65 articles
Browse latest View live